DIY: Luck T-Shirt
 I can't believe I'm already posting another DIY craft, but I needed more than just sparkly glitter shoes to make my outfit shine on Saturday! As you know, I tend to take my holidays very seriously (I already have the perfect dress for 4th of July) and so a couple weeks ago I started thinking about what I'd wear for my favorite green holiday. My roommate Kaila and I were heading out to San Francisco and unlike years past it was not going to warm or sunny. I really wanted to buy this cute shirt from Victoria's Secret, but I was not about to spend $35+ on it. So I did what any girl would do - I took to Pinterest for a little DIY t-shirt inspiration. Surprised? Probably not, but this is what I found! Overall, this was another fairly simple project. Simple to those who like crafts I guess I should say. And by making myself a one of a kind shirt I save half the money I would have spent at VS.

Supplies:
- T-shirt (Target, $7.99)
- Fabric, cut from a pair of boxers (Target, $5.99)
- Heat-n-bond (JOANN fabric and craft store, $3.99)
- Thread (JOANN, $2.79)
Overall I saved about $15 dollars and probably if I'd hunted a little harder through my closest I could have probably saved additional money with a old t-shirt. So here are the steps.
1) If you're a stickler like me then you may want to type up your letters or whatever you plan on putting on the shirt. That way you know exactly how much fabric you'll need to cut out and you can cut them out and use them as a tracing guide. I did mine in Adobe Illustrator, but you could easily do it in Microsoft Word.
2) I cut out my "pattern", laid the letters on one leg of the boxers and cut a square around them. I left about a half inch border around the letter because I wasn't sure of what I was going and weather I'd cut the letters exactly to size or not.
3) When you pull out your heat-n-bond you'll notice one side is kind of rubbery feeling and the other side has a paper backing. I pinned the piece of fabric to the heat-n-bond and cut out around the fabric so that you now have to squares as close in size as possible.
4) I ironed everything on my dining table, atop the table runner. You could probably get the same effect by laying down a dish towel. Lay your fabric down, with the wrong or backside of the fabric facing up to you. Then lay down the heat-n-bond with the paper side facing up. Follow the instructions on the back of the package. My iron was on medium heat, and it took less than 2 minutes to bond the two materials together.
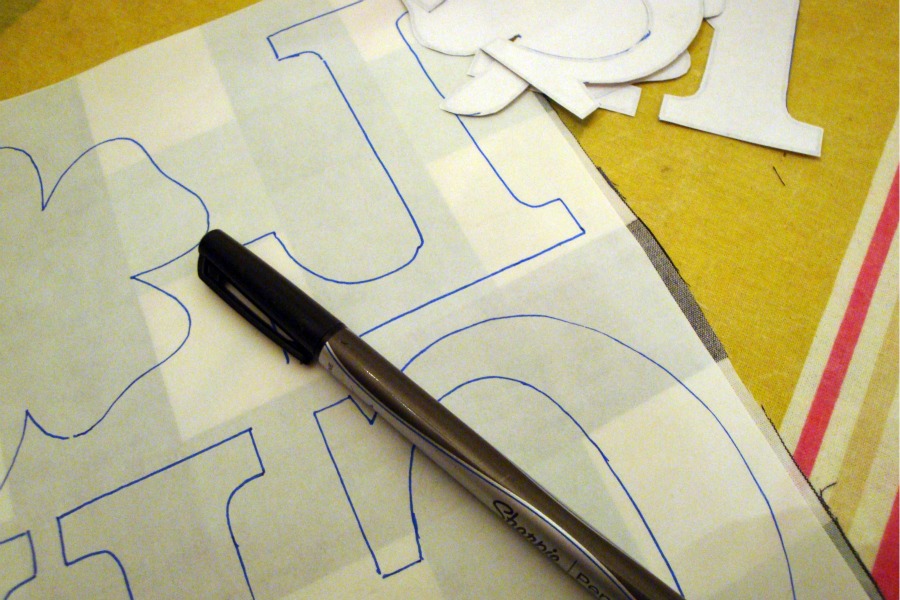
 5) Take your letters that you'd previously cut out, flip them over so they read backwards like you see in the photo above. I traced around my letters with a fine tipped sharpie on the paper backing of the heat-n-bond.
6) Cut out your letters with fabric scissors.
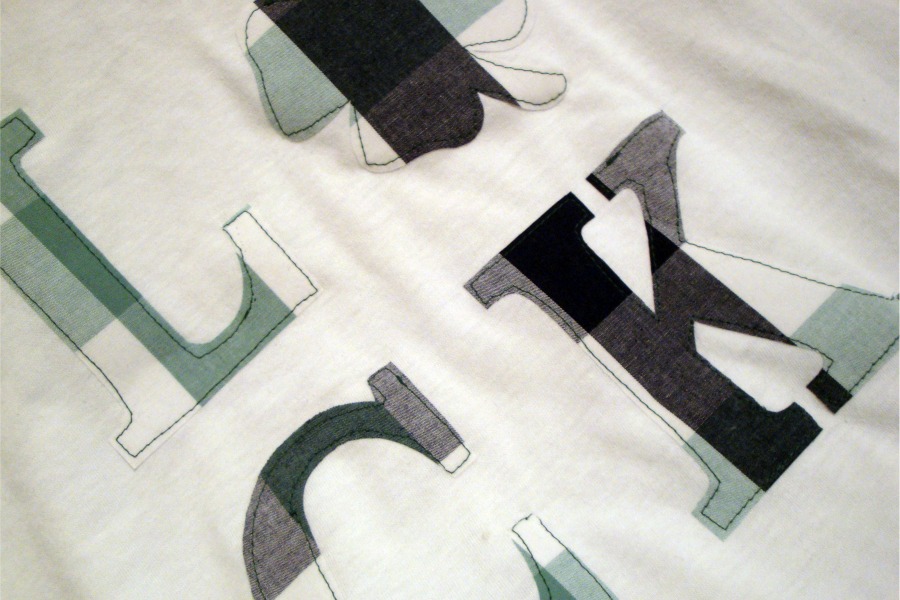
7) Arrange your design on your t-shirt however you'd like it to look. I then, one by one removed the paper backing from the letter, laid it back on the shirt in the appropriate spot and sealed it to the shirt with the iron. Mr. G brought up a good point while watching me do this - lay your iron directly down onto the letter and hold it there for a few seconds. My first instinct was to swirl the iron around, but you risk shifting your letter on the shirt before it's "stuck" to the shirt. So press and hold first, then move the iron around after you're sure it's stuck.
8) I had to outsource this last step as one skill that I'm lacking is knowing how to sew. I thought it would look cute to sew an outline around each other letters. It really helped the letters pop on the shirt. Thank goodness for Mr. G's mom and her awesome sewing skills! :)
Sorry if my explanation was a little long winded, but during my research I saw people doing things a couple different ways. I got confused and I didn't want that to happen to you guys. If you do have any questions please don't hesitate to email me or leave a comment below!

